How to Start a Blog on Hostinger Step by Step (Even If You’ve Never Bought Hosting Before)


Disclosure: This page contains a referral link. If you buy through it, we may earn a small commission at no extra cost to you, and you get an extra discount. We only recommend tools we use ourselves — JobyRoz runs on Hostinger.
Starting a blog sounds technical. It isn’t — not anymore. If you can sign up for an email account, you can have your own blog live today. This guide walks you through every step of starting a blog on Hostinger, in the exact order you’ll see it on screen, including the small checkout details most guides skip.
The Quick Answer
To start a blog on Hostinger: choose a hosting plan (Premium is enough for a first blog), create your account, pick your billing term, claim your free domain, then install WordPress with one click from Hostinger’s dashboard. Signup to live blog: roughly 30 minutes. The only part needing real thought is your domain name — the rest is clicking through.
Before You Buy: Three 5-Minute Decisions
The technical setup is the easy part. Settle these three first and the rest flies.
- Your blog’s topic. Pick one main topic, not five. A blog about “personal finance for college students” will grow faster than one about “a bit of everything.” You can always widen it later.
- Your domain name. This is the name people type to find you, like mytraveldiary.com. Keep it short, easy to spell, and skip the hyphens. Have two or three backup names ready in case your first choice is taken.
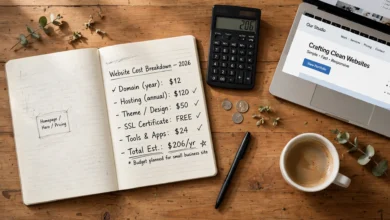
- Your plan. For a first blog, Hostinger’s Premium plan is all you need: free domain for the first year, free SSL, weekly automatic backups, and one-click WordPress install. Higher plans (Unlimited, Cloud Startup) mainly add more websites, daily backups, and faster storage. You can upgrade later in one click, so there’s no reason to pay more on day one.
Step 1: Choose Your Hostinger Plan
Start your blog with Hostinger’s beginner plan here → — going through this link applies an extra discount to the current offer and supports this free guide at no extra cost to you.
On the Hostinger homepage, click into web hosting. You’ll see three plans side by side: Premium, Unlimited, and Cloud Startup. For a first blog, click Choose plan under Premium — it carries a 30-day money-back guarantee, so there’s little risk in trying it.
A quick honesty note about term length: the lowest monthly price shown is for the longest term, paid upfront for the full period. A shorter term costs more per month. A 12-month plan is a fine middle ground if you don’t want to commit for years on your first blog — pick what fits your budget, not what looks best in the ad.
Step 2: Create Your Account and Review the Cart
After choosing a plan, you’ll pick your billing term and create your account with an email and password. Then you land on the checkout page — read it carefully before paying.
Read your cart line by line. This matters more than anything else on this page:
- Check the term. The discount headline is always for the longest term — make sure the months shown match what you wanted.
- Look at the renewal price. Hostinger shows it on the page. The renewal rate is higher than the intro price, which is standard across almost every hosting company. Knowing it now means no surprise email in a year.
- Remove add-ons you didn’t ask for. Hostinger may pre-check extras like additional security services. If you don’t know what an add-on does, uncheck it. Free SSL, which actually matters, is already included.
Complete the payment and check your email — Hostinger sends your login details. You now own web hosting. The scary part is over.
Step 3: Claim Your Free Domain Name
Every Premium plan and above includes a free domain for the first year. After signup, Hostinger will prompt you to claim it — you can do this during the onboarding flow or later from your dashboard under the Domains section.
This is where those backup names come in handy. Type your first choice into the search box. If it’s taken, try your backups, or add a word (“my” + topic, or your name + “blog”). The domain is free for the first year; after that, it renews at the standard domain rate, which you’ll see quoted before you claim it.
Tip: avoid buying the domain somewhere else unless you have a real reason to. Keeping your domain and hosting in the same Hostinger account means fewer logins, no DNS fiddling, and one support team when something breaks.
Step 4: Install WordPress in One Click
Hostinger doesn’t use the old-style cPanel that confuses beginners. It uses its own dashboard called hPanel, which is noticeably simpler. Here’s the install:
- Log in to your Hostinger account and open hPanel.
- Click Websites, then Add website or the Auto Installer.
- Select WordPress.
- Fill in your blog title, and choose an admin username and password. Do not use “admin” as the username — bots attack default logins first.
- Click Install.
That’s it. In under a minute, WordPress is on your domain. Hostinger shows you the link to your WordPress dashboard — usually yourdomain.com/wp-admin — where you log in with the username and password you just created. Visit your domain in a new tab and your blog is live. It’ll look plain for now; the next step fixes that.
Step 5: Set Up the Blog Basics (Theme, Pages, Plugins)
Your blog works now, but it’s wearing the default outfit. Spend an hour here — this is what separates blogs that look trustworthy from ones that look abandoned.
Pick a theme. In WordPress, go to Appearance → Themes → Add New and try a free beginner theme like Astra, Kadence, or GeneratePress — light and professional without tweaking. You can change it anytime without losing posts.
Create three pages. Under Pages → Add New, publish: an About page (readers trust blogs with a human behind them), a Contact page, and a Privacy Policy page. That last one matters — Google AdSense requires it before approving your site for ads, and a free generator builds it in ten minutes.
Install only these plugins to start: an SEO plugin (Rank Math is free and excellent), a caching plugin, and a backup plugin. Every extra plugin slows your site — add more only when you have a specific need.
Turn on SSL. Your free SSL certificate installs automatically, but check: visit your site with https:// and look for the padlock. If WordPress still shows the non-secure version, go to Settings → General and make sure both URLs start with https.
Step 6: Write and Publish Your First Post
Go to Posts → Add New and write about something you actually know — your first post doesn’t need to be perfect, it needs to exist. Keep paragraphs short, add subheadings every few paragraphs, and include at least one image from a free stock site like Unsplash or Pexels.
Hit Publish. Congratulations — you’re a blogger. Your first ten posts are about finding your voice, not about traffic.
4 Checkout Mistakes That Cost Beginners Money
Since most “how to start a blog” guides gloss over the buying part, here’s the honest section — the mistakes real beginners make on the Hostinger checkout page:
- Buying the biggest plan “just in case.” A first blog does not need cloud hosting. Start small — Hostinger lets you upgrade mid-term, so overbuying on day one is money sitting idle.
- Ignoring the renewal price. The intro discount is real, but the renewal rate is what you’ll pay from year two onward. It’s printed right on the pricing page. Every major host does this; the honest move is knowing it in advance.
- Leaving pre-checked add-ons in the cart. Premium support packages, extra security tools, site seals — most are unnecessary for a new blog. Uncheck anything you can’t explain in one sentence.
- Waiting for the “perfect” domain. A decent name you own today beats a perfect name you’re still searching for next month.
FAQ
How much does it cost to start a blog on Hostinger?
Your main cost is the hosting plan, paid upfront for the term you choose. Premium is the entry option and includes a free domain for the first year, free SSL, and weekly backups. Check Hostinger’s current pricing page for today’s rate — promotions change — and note the renewal price so you know what year two costs.
Is Hostinger good for a first blog?
Yes, for most beginners it’s one of the simplest starting points: one-click WordPress install, a beginner-friendly dashboard, free domain and SSL bundled in, and 24/7 chat support. The 30-day money-back guarantee means very little risk to try it.
Do I need technical skills to start a blog on Hostinger?
No — the whole process is clicking through guided screens. If you can shop online, you can do this.
How long does it take to start a blog on Hostinger?
Roughly 30 minutes from signup to a live WordPress blog: about 10 minutes for the plan and checkout, 5 minutes to claim your domain, under a minute for the WordPress install, and the rest for basic setup.
Can I move my blog to Hostinger later if I start somewhere else?
Yes — Hostinger offers free website migration and its support team handles the move. But starting here directly is simpler than migrating later, so if you haven’t bought hosting anywhere yet, there’s no reason to wait.
Your Blog Can Be Live Tonight
Here’s the whole thing one more time: pick a topic and a domain name, grab Hostinger’s beginner plan, review your cart carefully, claim the free domain, install WordPress in one click, and publish your first post. Six steps, one evening, and you own a real piece of the internet.
 🌐
Free Website
🌐 FREE Website — Turn Your Ideas Into Income
Disclosure: This article contains an affiliate link. If you purchase hosting through it, we may earn a commission at no extra cost to you.
Disclosure: We may earn a referral commission when you buy through our link, at no extra cost to you — in fact you get an extra discount through it. JobyRoz runs on Hostinger, so this is the same hosting we use and trust.
 🐶
Free Pet Guides
🐾 Got a Dog at Home?
🧮Money Tools
Earnrove - Free Money Calculators